Setting up some bee hives can attract the world’s favorite pollinators to your garden. Whether you want to pick up beekeeping for the pleasure of it or you have more practical reasons–did anyone say honey?–you’ll need some beehives, and this is what this post is all about.
In this easy guide, we’ll look at the different types of bee hives out there including their components and parts.
We’ll share with you a selection of the best DIY bee hive plans you can build yourself at home as well as bee hive kits you can buy if you don’t have the time to build your own.
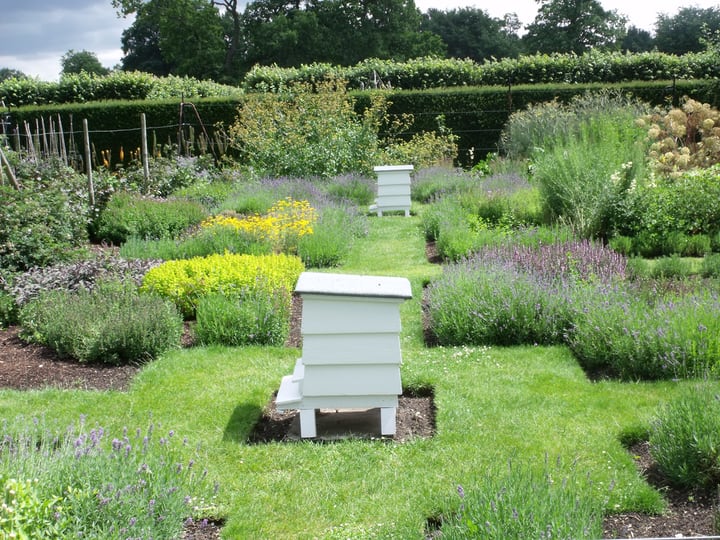
Getting started with a bee hive is easier than most people would assume, provided that you know the essentials about bees and the homes they like to live in. So, are you ready to get started?
Different Types of Beehives Explained
Before we look at bee hive components and plans, let’s first have a look at the most widely used types of bee hives today. In other words, the most accessible and effective.
Just as there are lots of different houses on the market, so there are different bee hives based on their structure.
Even homemade bee hives, which you can say are unique, tend to be based on one of these main types.
Langstroth Hive
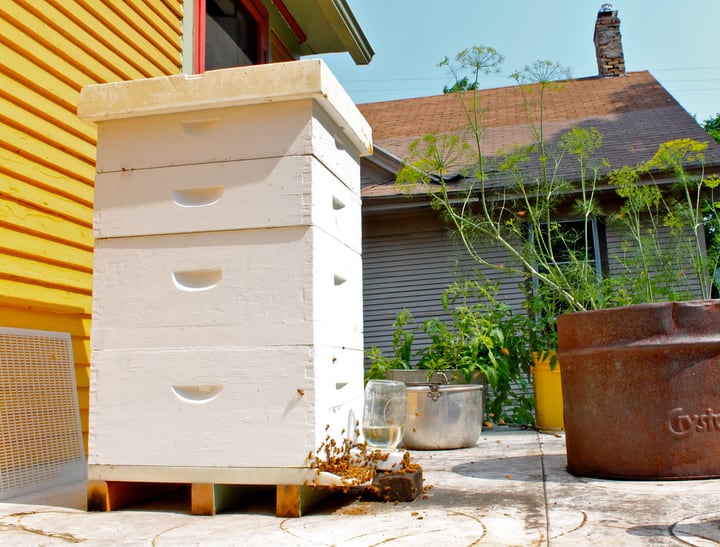
Probably the most popular type of bee hive around, the Langstroth is named after its inventor, a 19th-century clergyman considered the father of American beekeeping.
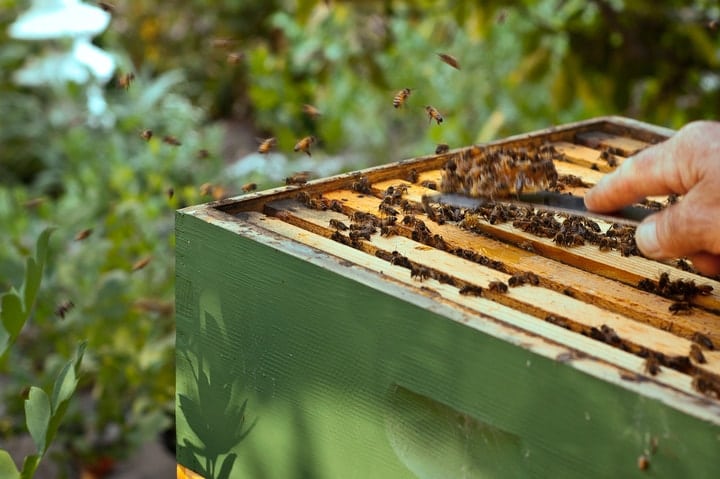
This is a type of vertical hive that looks not unlike a chest of drawers with the larger drawers at the bottom and the smaller ones on top. The lower chambers are for the bee brood.
It uses space efficiently to allow bees to do their everyday work. Most importantly, it allows bee keepers to inspect the colony without having to destroy the comb.
With this type of hive, you can add additional boxes one on top of the other. The design ensures that the brood always has enough honey.
You basically only take the honey from the topmost chamber, which the worker bees will fill only after they have first filled the lower chambers.
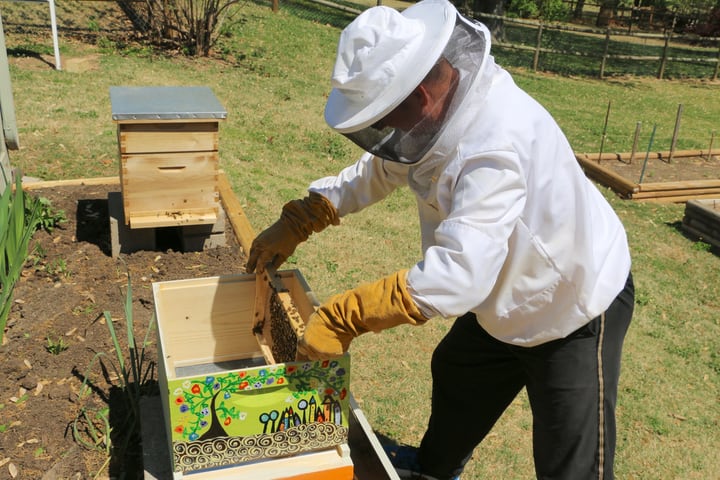
Advantages
- Great for producing honey
- Widely available
- Easy to use
- Simple maintenance
Disadvantages
- Not ideal if you have back pains as to inspect the hive you have to lift the upper boxes
Warre Hive
The next type of bee hive we’re going to talk about is the Warre hive, named after another clergyman, this one French. This is also a stacked hive. In its design, it resembles a hollow tree, allowing the bees to build downward.
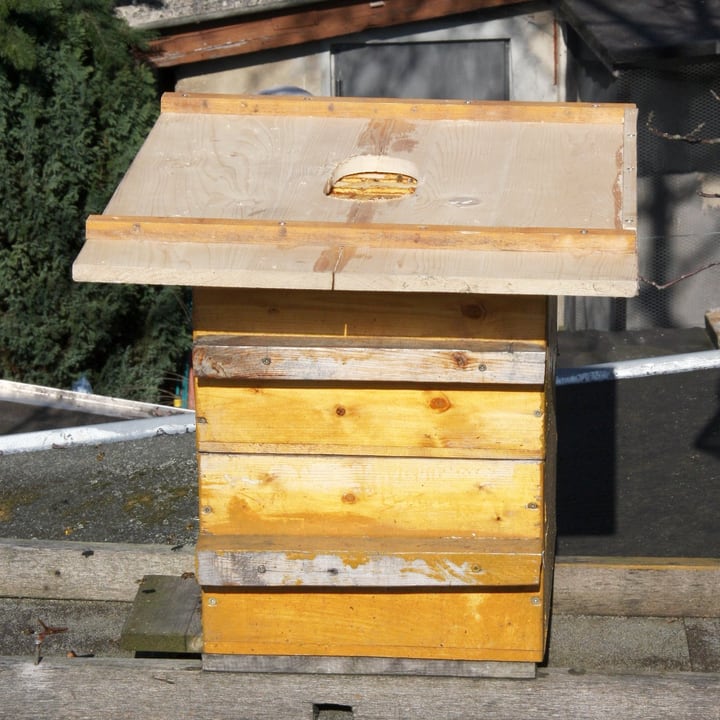
Unlike the Langstroth, if you choose this type of hive, you’ll be adding boxes below the brood boxes, rather than on top. This gives bees the freedom to build their hive as they would in a hollow tree.
The Ware hive enables you to harvest the last brood comb, encouraging the queen to lay new eggs in a new comb. This keeps the comb clean and limits contaminants.
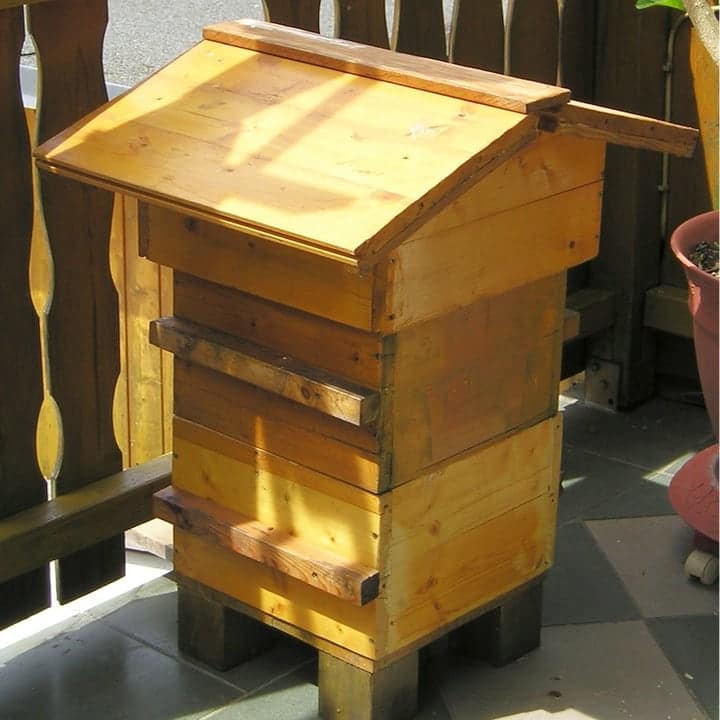
It’s one of the most bee-friendly hives around and a good choice if you’re particularly concerned about creating an environment that’s as close as possible to how bees establish a colony in the wild.
Advantages
- Affordable and easy to build
- Easier to maintain than other types of bee hives
- Keeps the comb clean for the bees and sustains their natural building habits
Disadvantages
- Difficult to inspect if a serious problem occurs in the hive
- You can’t easily separate boxes without damaging the comb
- Heavy lifting required to lift all the boxes before adding another one
Top Bar Hive
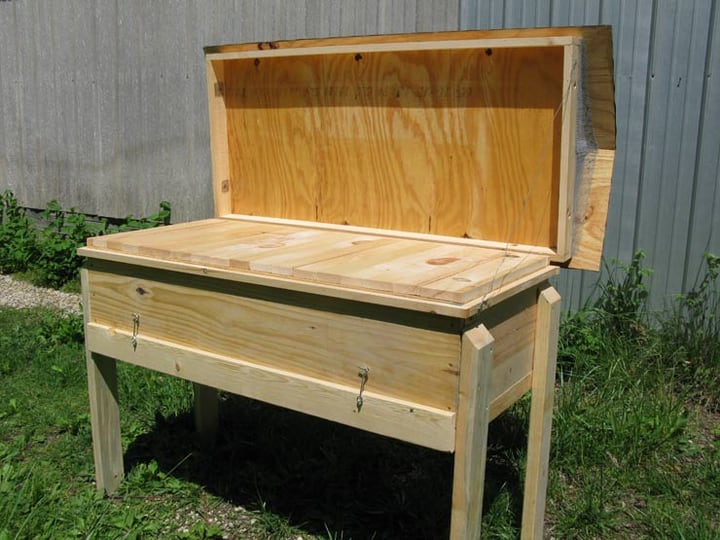
This single-story bee hive is one of the oldest and most used bee hives around. Unlike other hives, it has no frames. Top bar bee hives enable bees to build their combs according to the needs of their colony.
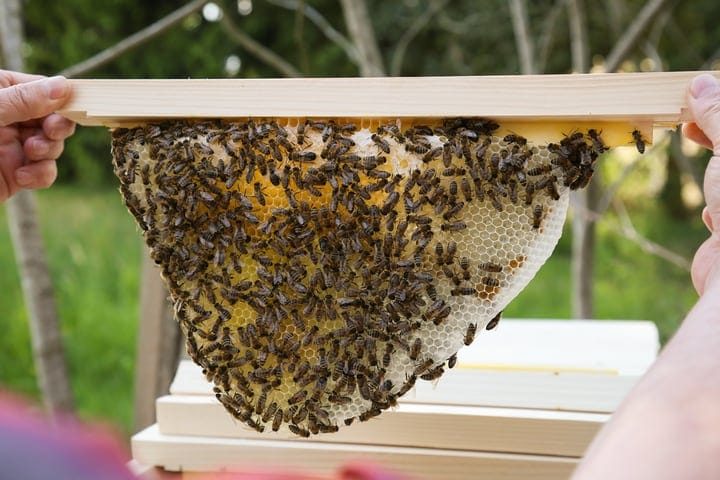
This design doesn’t require any lifting–at all. Also, you can inspect the bees without any fuss by lifting the top of the hive, which is usually hinged.
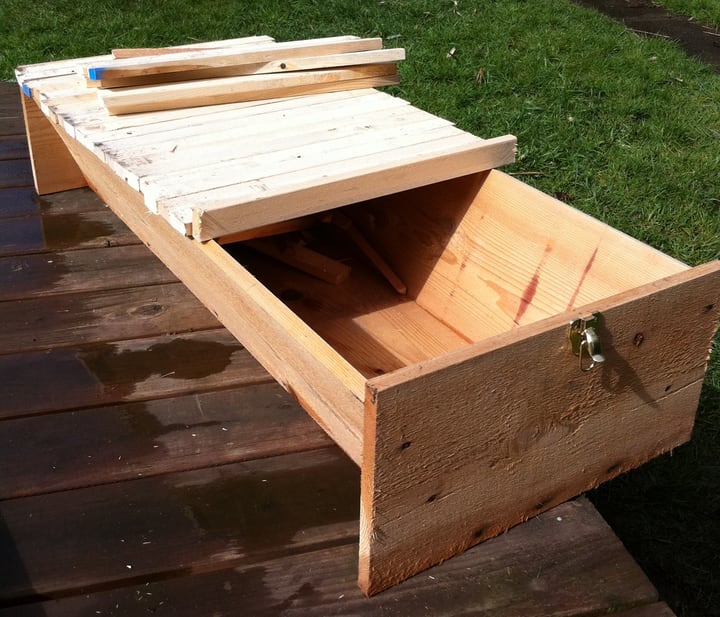
The simple honey harvest method and quick inspections that this hive allows make it a favorite for beginners.
Advantages
- Makes removing combs easy
- No heavy lifting or other manual work needed
- Inspections don’t disturb the bees
Disadvantages
- Often smaller than other bee hives
- Finding components for it can be harder than for other types of hives
Long Hive
The long hive is based on the Langstroth but it’s a horizontal rather than a vertical hive. In it, the bees tend to keep their brood near the entrance and fill the other spaces with honey.
The top of the hive is often hinged so that you can open it like a chest.
One advantage of this design over other bee hives is that it can incorporate a window through which you can inspect the hive without having to do any lifting and without bothering the bees in any way.
On the other hand, this hive will take more ground space and doesn’t allow you to expand the space allotted to the bees. In this regard, you’re limited by the total capacity of the hive.
Advantages
- Easy to inspect (especially versions with a window)
- Doesn’t require any lifting
- More practical for some bee keepers than vertical bee hives
Disadvantages
- Components and parts from other bee hives may not fit into it
- Tends to be more expensive than other hives
Bee Hive Components and Parts
The components and parts of a bee hive depend on the type of hive you choose. We’ve already seen that some hives are smaller than others and use space differently.
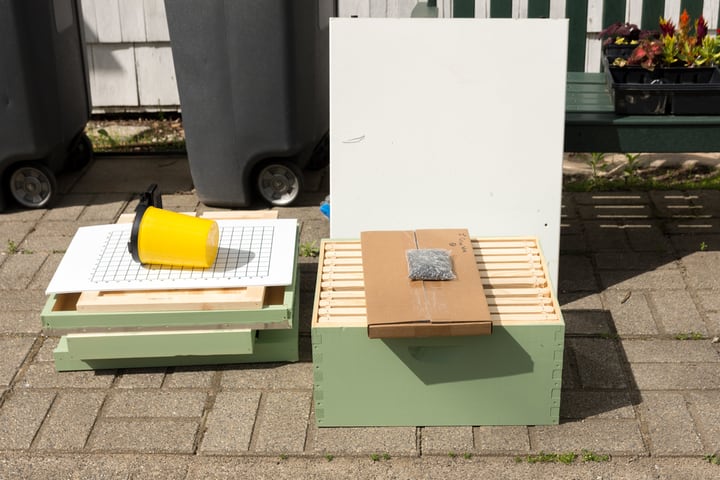
With that in mind, there are a number of essential components and parts that most bee hives have, regardless of their design. These are the fixtures that facilitate inspection, harvesting, and organization within the hive.
Let’s take a closer look at the key components you need to be aware of when building or shopping for a bee hive.
Bottom Board
This is the bee hive floor that projects the bees from dampness. Screened bottoms are popular in vertical bee hives as they improve ventilation.
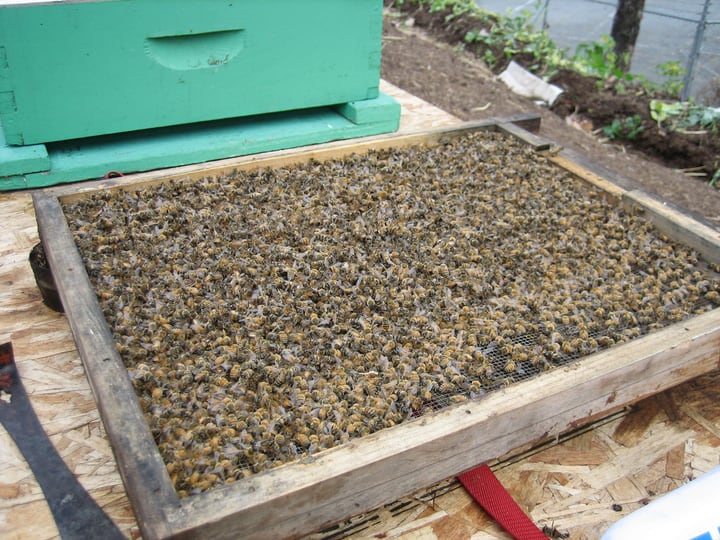
Whether or not it’s screened, the bottom board has to be durable to support the weight of the brood chambers.
Deep Hive Bodies
These are the boxes reserved for the brood chamber and the food chamber above it. Some bee hives use only a deep box for both the brood and the food chambers.
These are very important components of the hive as without them there would be no bee colony and no honey either.
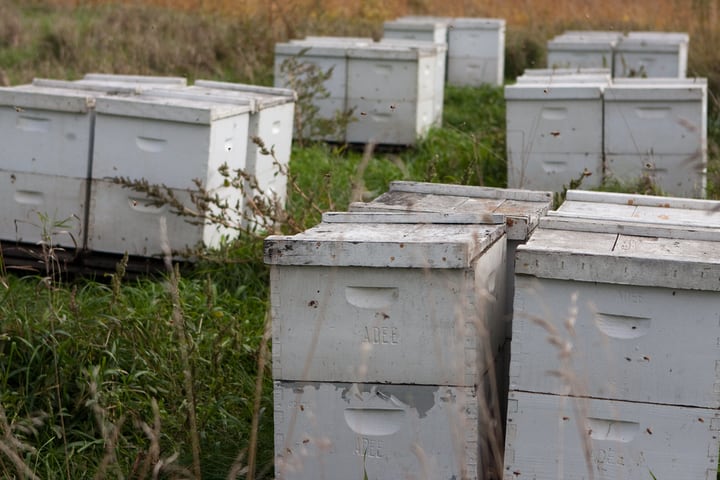
Bee keepers don’t normally take honey from these chambers but from the honey super, which will talk about next.
Honey Supper
Honey suppers are medium or shallow hive bodies or chambers in which bees build their comb after first filling the brood and food chambers. It’s from the honey supper that you collect the honey.
In a Langstroth hive, these are placed on top of the deep hive bodies. In a Warre hive, they come below.
Depending on the size of the colony and the hive, you can use multiple honey suppers. As the colony increases, you can add multiple honey suppers, either in a top-up or top-down stack, depending on the type of hive you have.
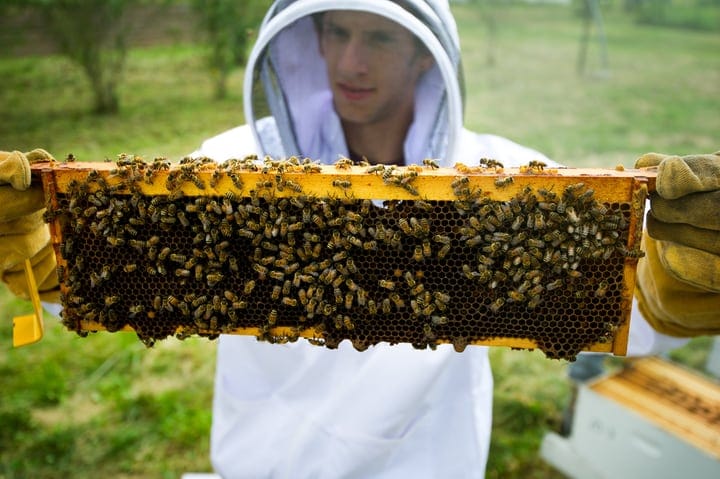
Bear in mind that some bee hives that don’t use stacked boxes may come with a predefined number of suppers which cannot be increased. Stacked bee hives tend to offer more flexibility in this regard.
Fact: A shallow honey supper can weigh 40 pounds when full of honey. Factor in the weight of the honey when choosing the depth of your honey super or you may need help lifting it.
Frames
Removable frames are typically made from wood and contain beeswax foundation for the bees to build their honeycomb in them.
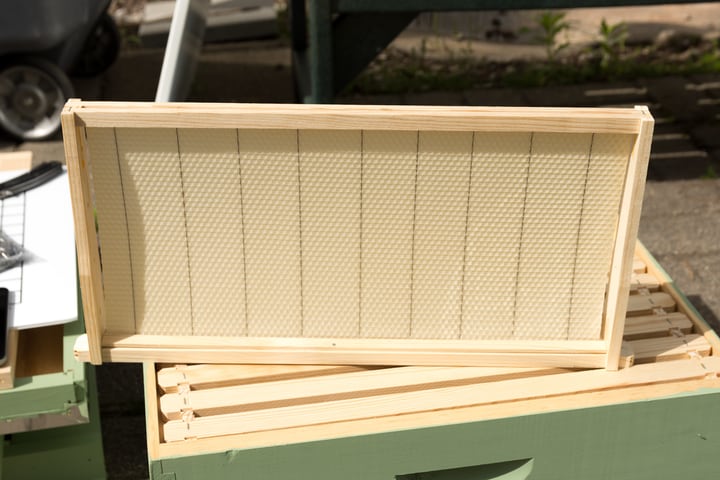
Frames come in different thicknesses and sizes. You can remove them to inspect and manage your bees.
But some bee hives are frameless, such as the top bar hive, which enables bees to build a honeycomb without any frames.
Inner and Outer Covers
Inner covers come in the form of a screen that’s placed in front of the hive to provide ventilation. Outer covers are for the bee house what the roof of the house is for your home.
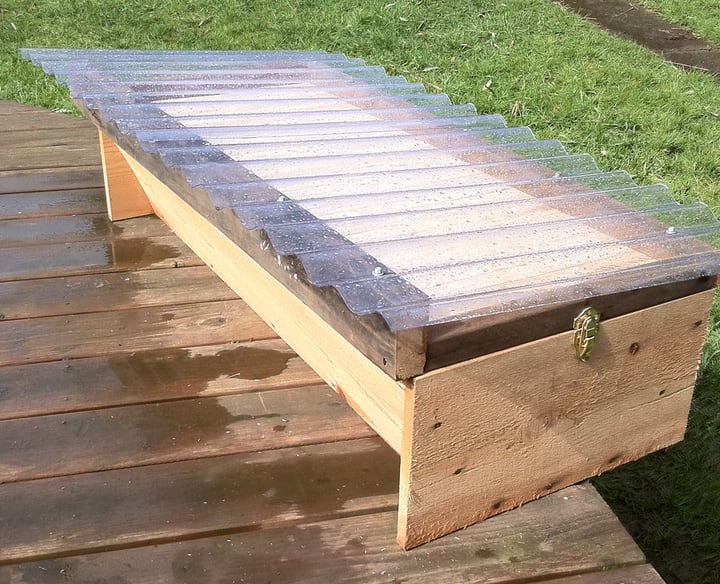
While many bee hives are made from wood, the outer cover can be made from a weatherproof material to last longer. Think light shingles. The outer cover is usually removable or hinged.
Hive Stand
The stand keeps the hive off the ground, which has a number of advantages. For the bees, it promotes better air circulation, reduces potential damage from rot, and prevents grass from blocking the entrance into the hive.
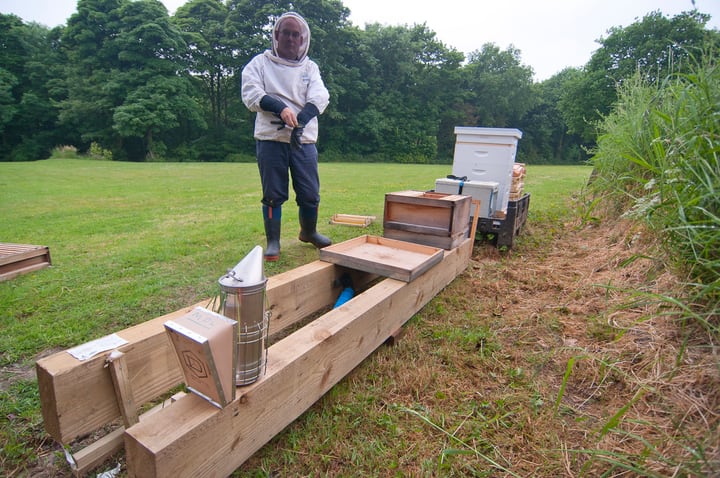
For you, it makes inspection easier since you don’t have to stoop each time. A tall hive stand can also be a good defence against a dog or other pet that may bump into the hive in play or by accident.
Entrance Reducer
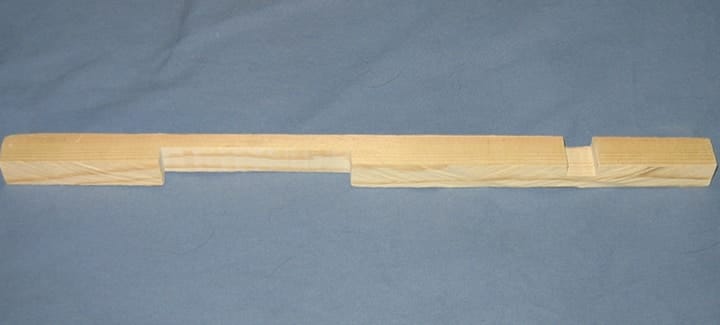
As you may guess from the name, this feature in the shape of a small notch helps you control bee access into the hive by limiting or increasing the entrance space. This is a detachable feature in most hives.
Queen Excluder
The queen excluder is a flat rack with holes small enough for the worker bees to pass through it–but not their queen.
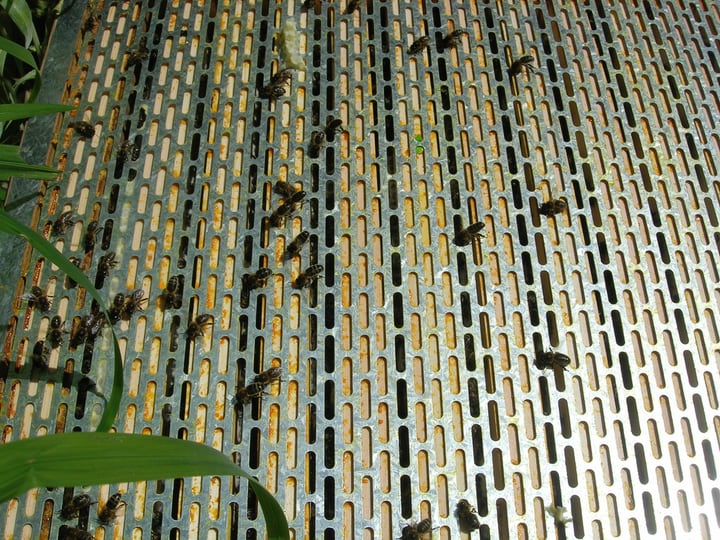
The purpose of this component is to prevent the queen from laying eggs in the honey super, which can make harvesting harder and create confusion in the hive.
Slatted Rack
This optional bee hive fixture raises the brood chamber higher to create better ventilation in the hive. In a big colony, it can help relieve congestion.
Best Bee Hive Plans to DIY
People have been building bee hives for over 150 years, often with less convenient tools than we have today.
Building a bee hive doesn’t require any special skills, just a few useful tools and a good understanding of bees and how they form a colony.
What you definitely want to have before you get to work is a bee hive plan that can guide your steps. To get you inspired, we’ve put together a list of beehive plans. Explore them now!
Simple Top Bar Hive
If you’ve never had a bee hive before, you may as well start with a simple one. This straightforward top bar hive doesn’t require any special materials and takes less space than other hives.
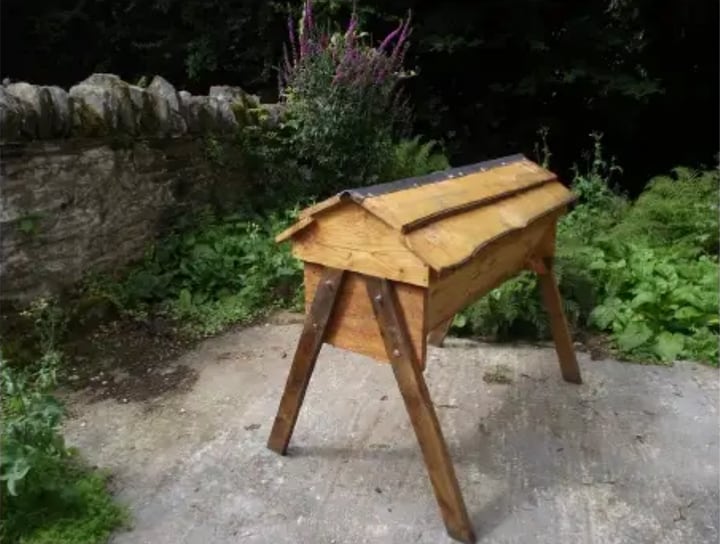
You can build it from planks and other pieces of wood you have at home. Another reason to choose this design is that it can help minimize the risk of being stung, especially if you haven’t got a beekeeping suit yet.
DIY Warre Hive
Ecological by design, the Warre hive is an old favorite of naturalist bee keepers. Check out these plans for a DIY warre hive you can build on your own.
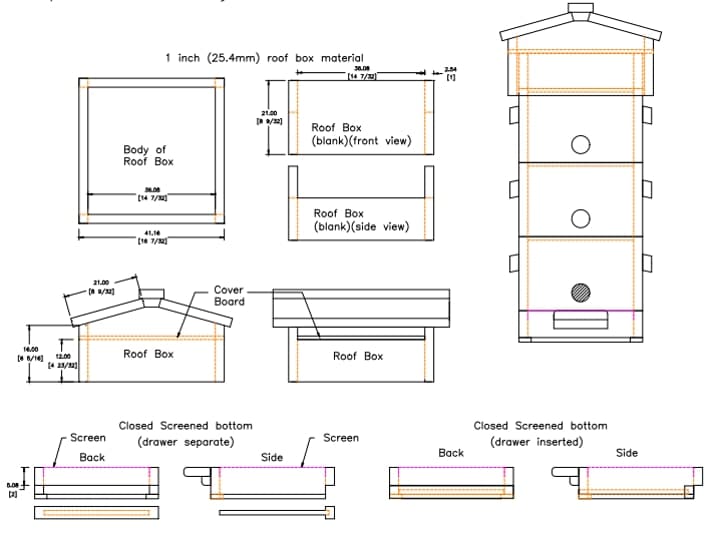
The plans are fairly simple, so you shouldn’t have any problem completing this project even if you’ve never built bee hives before.
Classic DIY Langstroth Hive
Looking for a functional and spacious hive that won’t break the bank? Check out this classic DIY Langstroth hive plan. Finding the right materials for it won’t be too hard and you can assemble them without any specialized tools.
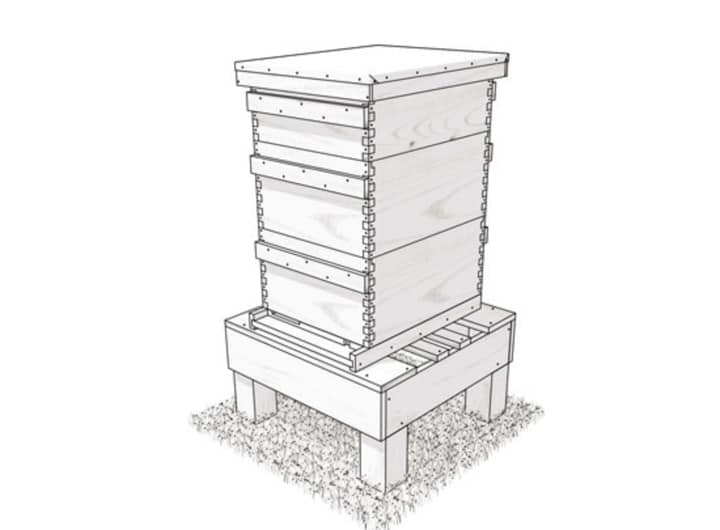
The enduring design of this hive makes it a reliable choice for most beekeepers, as well as a durable one, provided of course that you assemble it well.
Pallet Langstroth Hive
Got some spare pallets in your garage or shed? Then this could be one of the most affordable bee hives you can build.
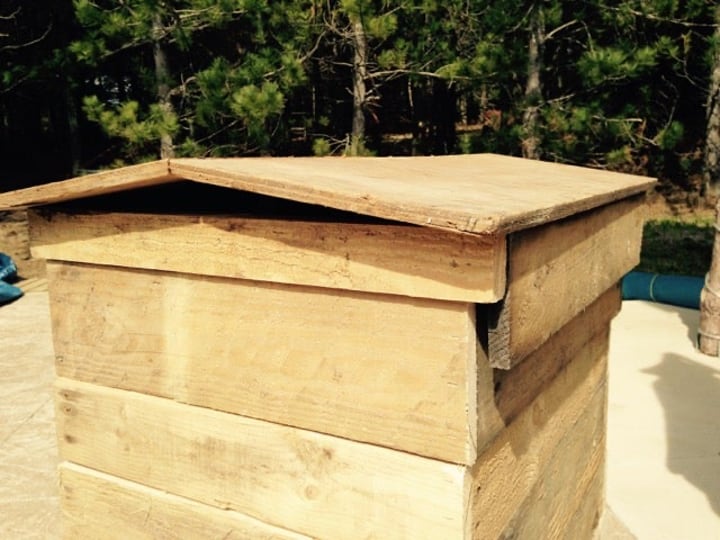
The pallet Langstroth hive is based on a classical design that makes harvesting honey a relatively simple process. You can leave it as it is or paint it to increase its resistance to the elements.
Small Ware DIY Bee Hive
As we’ve seen, the Ware hive creates very good conditions for the bees to build their hive the way they normally would in nature, from the top down.
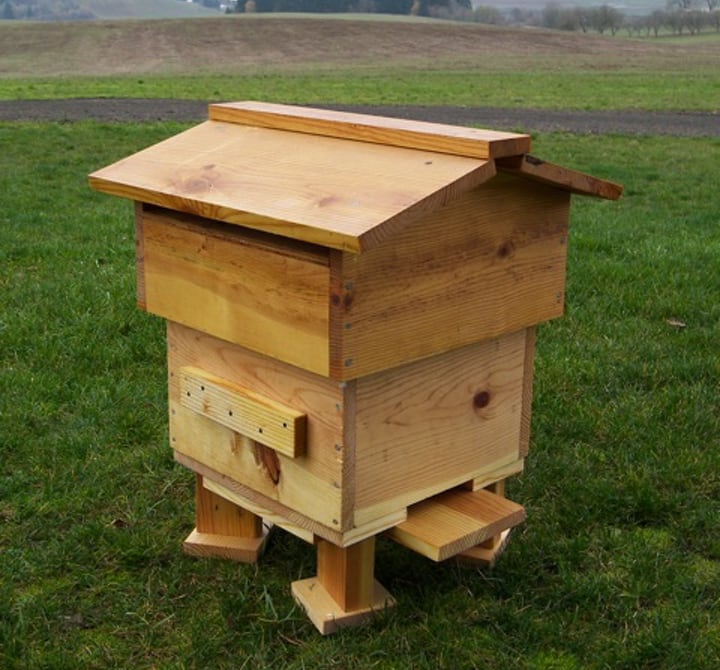
This small ware DIY bee hive is inexpensive and a great first hive for any beginner bee keeper who wants to start small and see how things go.
It requires fewer materials compared to other bee hives on our list. You can build it in just a matter of hours.
Large Plywood Honey Hive
If you’re raising bees primarily for honey, this large plywood honey hive could help you maximize honey production. With four honey suppers, it gives bees plenty of space to keep making honey.
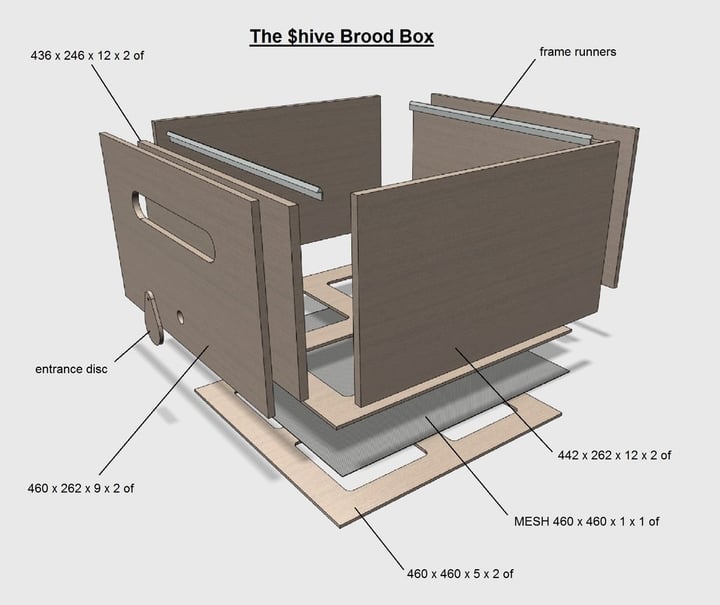
Although it’s bigger than other bee hives, it’s made from plywood, an affordable material. So it’s not too expensive and overall a sound investment for the honey-minded bee keeper.
Colorful Horizontal Hive
A bit of color and some creativity can transform an otherwise drab hive into an everyday joy that will add to the appeal of your backyard.
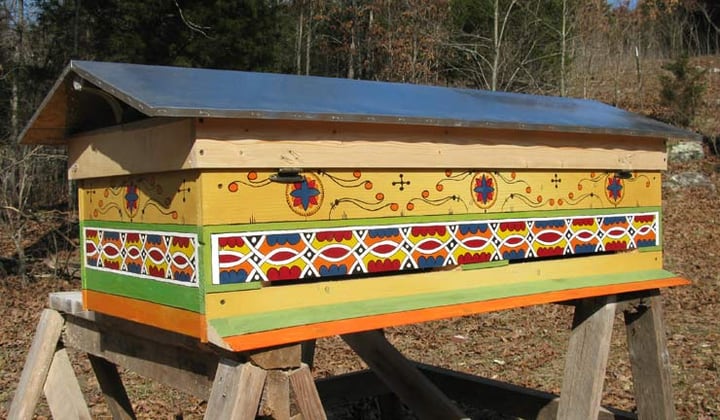
This horizontal hive stands out thanks to its coloring. But that’s just an idea–you can paint it any way you want. Find out how exactly to build it here.
Gallon Top Bar Hive
Why not get creative with your bee hive?
If you don’t have all that much wood on hand but have an old barrel lying around, clean it thoroughly, cut it in two, and turn it into a top bar hive. Here are the instructions for this bee hive plan.
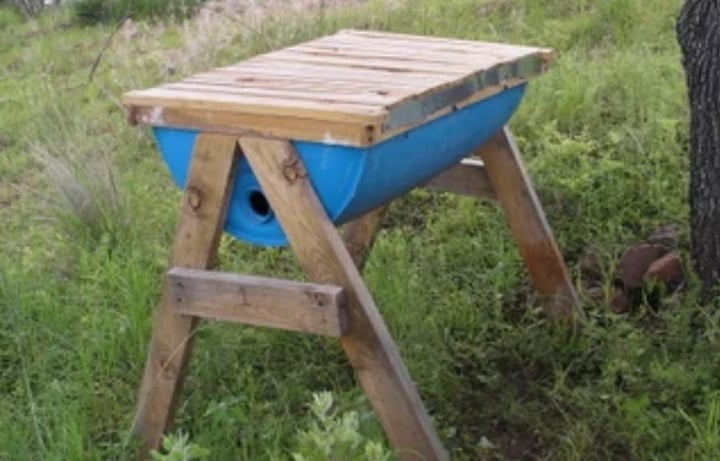
Keep in mind though that this one works best with a metal or heavy-duty plastic barrel. Cheap plastic barrels may crack during cutting.
The Jar Hive
Here’s another creative approach to building a DIY hive and one of our favorites.
To make a jar hive, you have to fit large jars to a wood brood box–the bees will be building their comb directly in the jars, which you can then easily remove to harvest the honey.
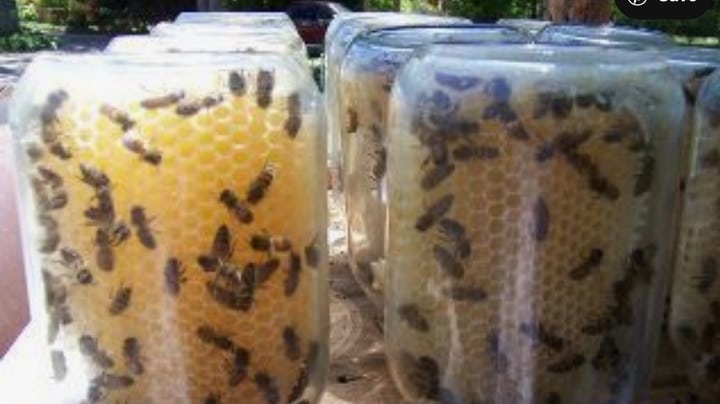
One of the coolest things about this hive is that you can see the bees at work. Besides, it will look interesting in any backyard.
Tire Bee Hive
The tire bee hive may not be the cutest around, but it’s certainly functional and inexpensive if you already have some spare tires. And you can leave it in the open without worrying that rain or shine will damage it.
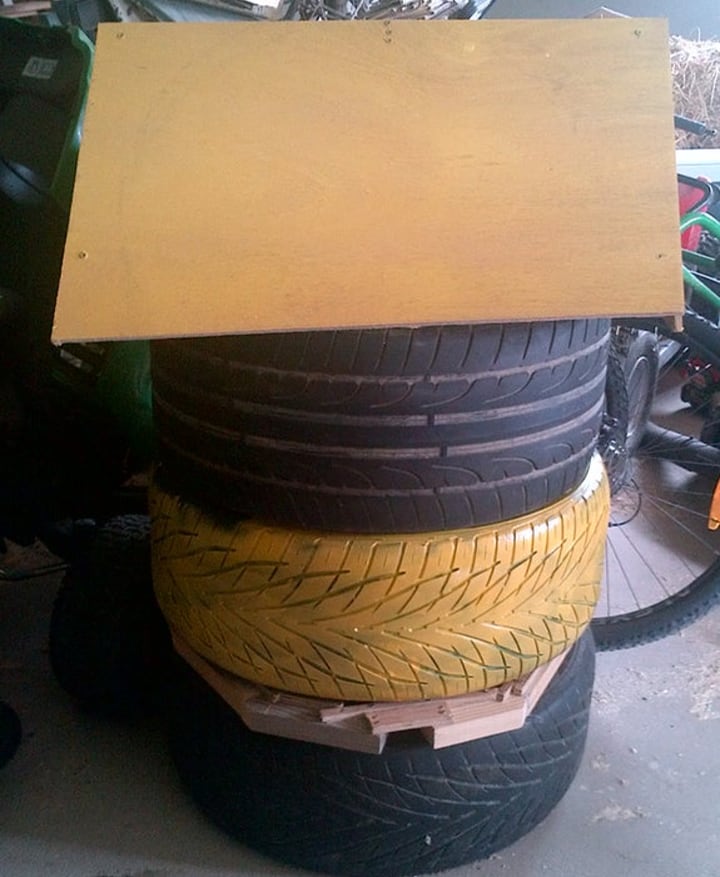
All you have to do to create it is stack the tires and create a roof and an entrance. You’ll need same-size tires, preferably larger ones to give your bees plenty of space to do their thing.
Bucket Bee Hive
DIY bee hives really don’t get any simpler than the bucket bee hive. You won’t be getting much honey out of this one, if any, at least not without disturbing the bee brood, which we don’t recommend doing.
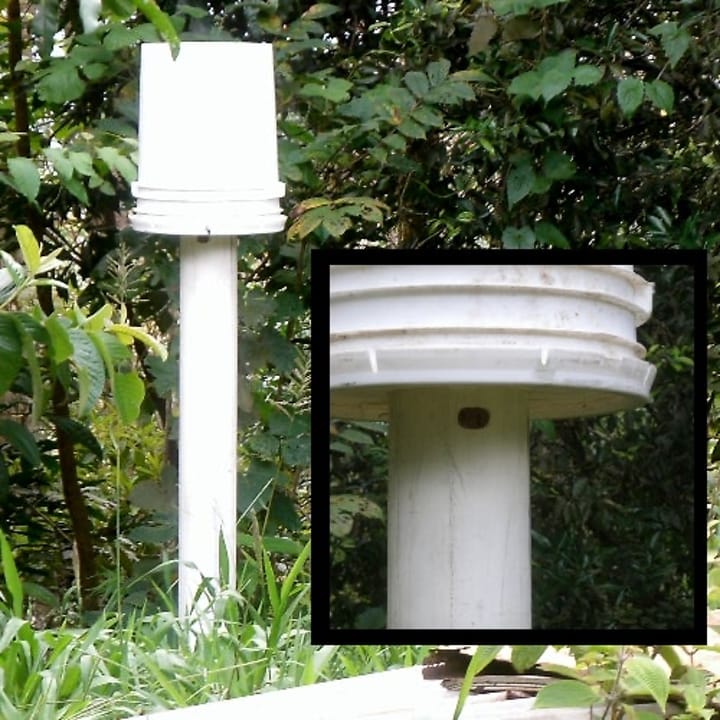
But if your mission is to attract more bees to your garden and make their life a little easier, this can be a creative choice. You don’t have to settle for a white bucket, either. You can paint it any color you want.
Bait Hive
Another way to attract bees to your garden is by building a bait hive. This bait hive is simpler than most other types of bee hives and could help you lure a swarm to your garden without danger.
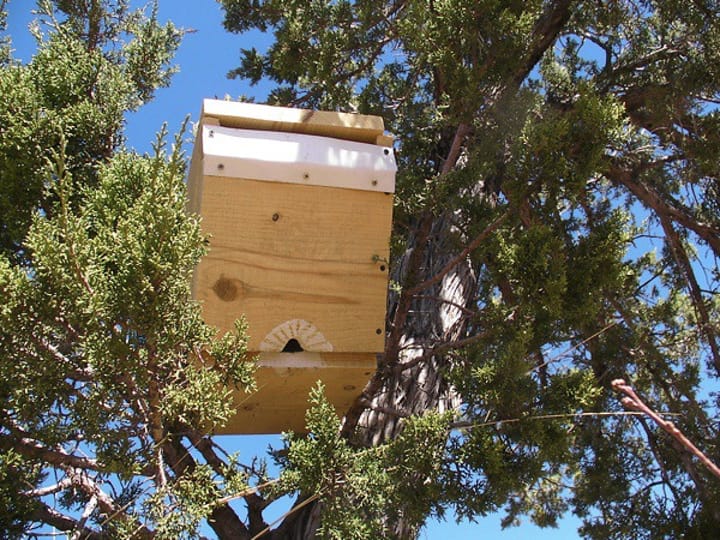
Tip: Placement is very important when it comes to bait hives, so make sure to study the habits of your local bee population. For safety reasons, don’t place them right next to your house or an outdoor sitting area.
How to Build a Simple Beehive
Now that we’ve explored a variety of bee hive plans and looked at the components they have, let’s see how you can build a simple bee hive step by step.
You don’t have to be an expert DIY-er to pull this off, but you do need the right tools and a systematic approach. It will save you from a lot of trouble.
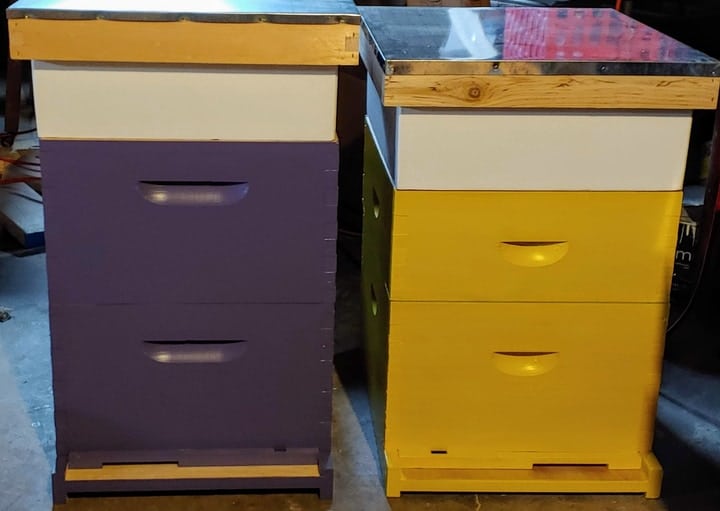
Tools & Materials Your Need
- Drill
- Screws (1-½”, 2”)
- Tin snips
- Hand saw and/or table saw
- Plywood/wooden boards
Step 1 – Draw Your Bee Hive Plan

Or use one of the plans we’ve shared with you. Either way, you want to start on paper to make sure you get the dimensions right and maintain a list of all the parts you’ll be needing.
Yes, it will take an hour or two, but you’ll save many hours of labor.
Step 2 – Cut the Wood
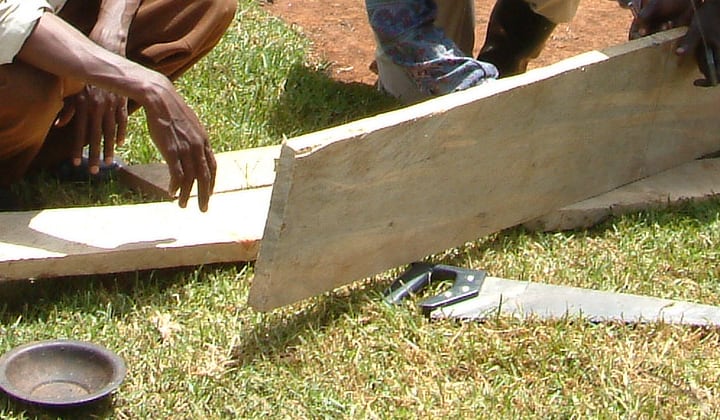
Whether you choose wood or plywood, cut down all the different parts that will make up your bee hive.
Even if you choose to design your own hive, you may want to check similar plans to get a better idea about the size of each component.
If you don’t have a saw at home or don’t feel comfortable with this part of the process, you could try to find a wood supplier that could do the cutting for you.
Or ask a friend to help you out with this task. The cutting has to be precise for all the parts to fit together nicely.
Step 3 – Build the Hive Bodies, Honey Suppers, and Covers
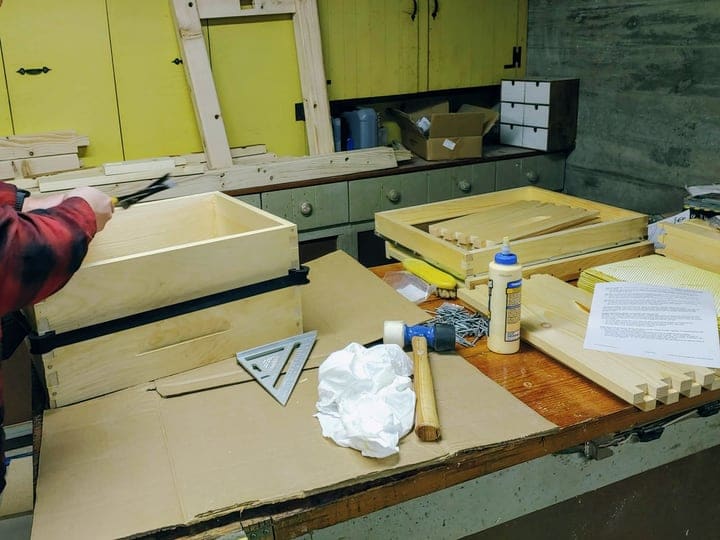
Put together the hive bodies which will contain the bee host and the bee supper. Depending on your type of hive, these may be at the bottom or at the top of your hive.
Horizontal or top bar hives tend to have just one larger horizontal box that you can compartmentalize.
Next, assemble the honey supper, from where you will be collecting honey. Use screws to fix the walls tightly. Remember that once they fill with honey and bees, honey supper will have to bear quite a lot of weight.
You also have to assemble the inner and outer covers. The inner cover can be as simple as a mesh with a wooden frame. To the outer cover, you can add a weatherproof roof. Optionally, you can also add a hinge.
Don’t forget about the hive stand, on which the rest of the hive boxes (or box) will lie. This one has to be sturdy and sit level with the ground.
Step 4 – Build the Frames and Other Optional Components
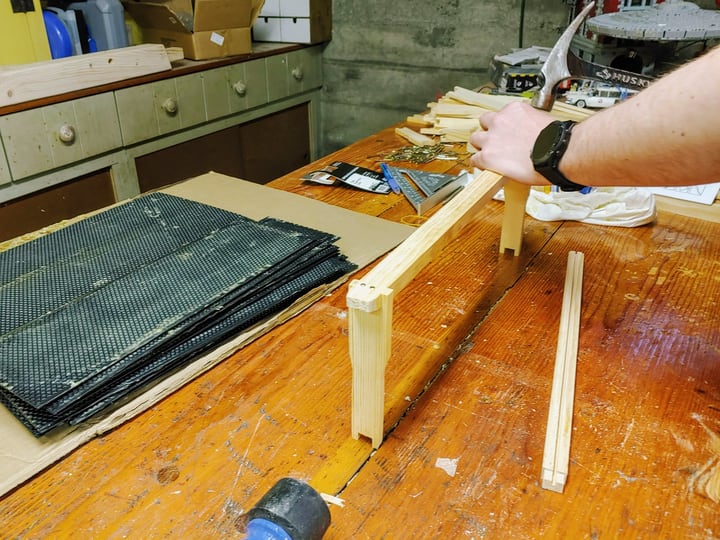
The frames are the next in line. The frames should be light but easy to handle. Don’t forget to coat them with a beeswax foundation.
If you are going to have a queen excluder, now it’s the time to make it. Queen bees tend to be around 20mm in size, sometimes larger.
To create a queen excluder, you can use a thin piece of wood into which you drill holes no bigger than 15mm.
Step 5 – Fit the Entrance Reducer
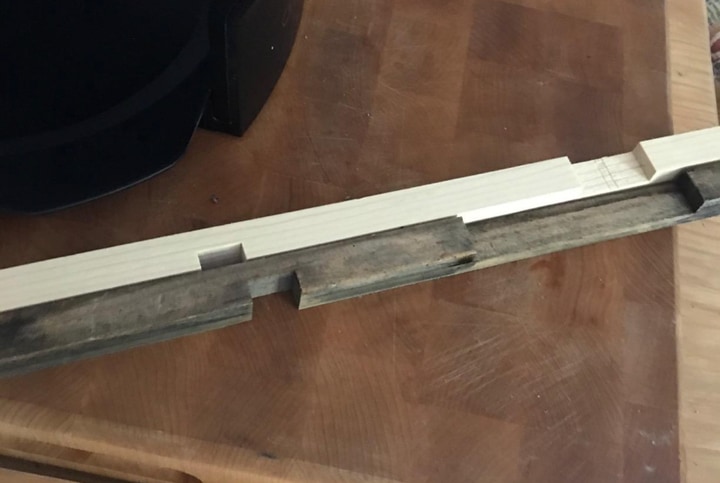
Don’t forget to add an entrance reducer to your hive. You can either cut tiny holes into a removable piece of wood with a saw or chisel or buy a metal bee hive entrance reducer.
Either way, this component should be detachable so you can easily control the flow of the bees inside.
Step 6 – Put All the Pieces Together
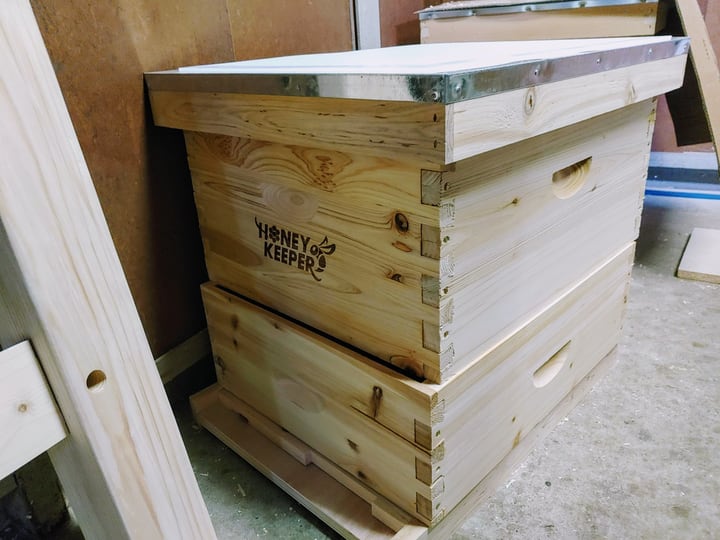
If you’ve got the measurements right and followed the plan, all the pieces should fit in together nicely. Otherwise you may have to do some extra cutting to circumnavigate any problems.
It’s very important for the hive to feel solid and be easy to access. Better address any problems you come across now than put them off until the bees make it their home.
Step 7 – Paint or Treat the Wood
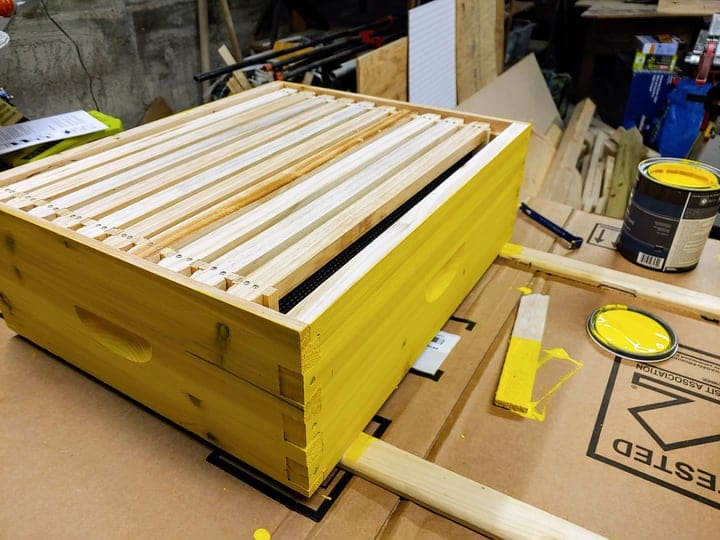
Last but not least, you may want to give your bee hive a coat of paint or treat it with a bee friendly sealant. Paint only the outside to avoid exposing the bees to any chemicals.
Bee Hive Kits to Get Started Right Away
Don’t have the time or the tools and materials to build a bee hive? You could get a bee hive kit instead. These come in many shapes and sizes so finding one that suits you shouldn’t be too hard.
8 Frame Bee Hive Kits
A good starting point for new beekeepers, 8 frame bee hives are lighter and easier to handle than 10 frame bee hives. In many cases, 8 frame hives outproduce their bigger counterparts in terms of honey.
This is because the smaller space enables bees to build their comb faster and maintains an optimal temperature in the hive.
These bee hives are also more affordable than 10 frame ones. Keep in mind though that this design typically uses more boxes than the 10 frame while also being taller.
10 Frames Kits
The industry standard in the US, 10 frame bee hives offer bees plenty of space. That means you can grow in them a large brood and produce lots of honey.
That said, the yields may sometimes be slower than with other types of hives (see above). An advantage of this design is that you have fewer boxes to inspect.
Wooden Beehive House
Most bee hives for sales are made from wood, a classic choice for most bee keepers. Bees like to build their colonies in a wooden bee hive because it mimics hives they would choose in nature, such as a hollow tree trunk or log.
Painted Beehive Kits
Some bee keepers favor painted bee hives because they are more durable and can be safely left outdoors without any risks. These usually also require less maintenance.
If you want to keep bees in the long term and make a sound investment, painted bee hive kits can be an inspired choice.
Beehive Placement: How to Choose the Best Beehive Location
Where you place your bee hives matters–for the bees, for yourself, for your neighbors. Ideally, you want to place bee hives in a spot where they are easy to access and not directly exposed to wind or the sun for long hours.
Also important is for the bees to have a water source nearby. When this is not possible, you may have to create a bee bath. Here are some more tips for choosing the best placement for your bee hive.
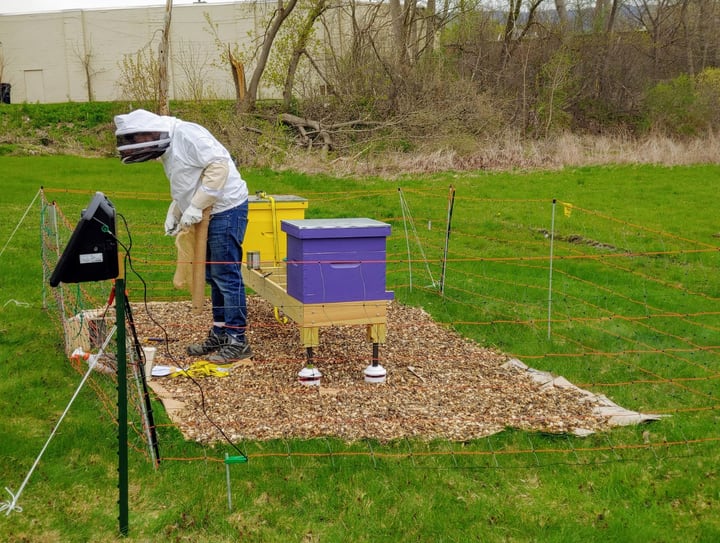
- Place the hive level on the ground. But if water doesn’t drain properly off the hive, raise the front of the hive slightly so that the water slides down the cover.
- Keep the hive out of deep shade as that can increase the dampness inside the hive, which is not good for the bees.
- Place it facing southeast and in a spot where it gets dappled sunlight. That’s often the best possible placement for most bee hives.
- Protect the back of the hive from cold winds by planting some tall evergreen bushes or hedges.
- Use mulch around the hide to keep weeds, grass, and other vegetation from making it harder for the bees to enter and exit the hive.
- Avoid placing the hive next to a neighbor’s wall or structure or close to a dog house.
If you can’t meet one or more of the criteria above, look for ways to circumvent any limitations to create the best possible conditions for your hive–your bees will be thankful!
Bee Hives Frequently Asked Questions
Now that we’ve covered the main points about bee hives, we are bringing together in this section the most common questions we keep hearing about bee hives–and there are a few! Explore now the answers.
How long do bee hives last?
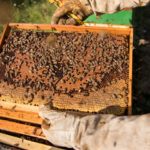
The physical structure of a bee hive can last for many years. A wooden bee hive, if well maintained and carefully positioned, can last for 10 years or more since you can replace bee hive components.
A bee hive colony, however, tends to last as long as its queen. A bee queen can live 3 years, after which your colony will need a new queen.
Are bee hives dangerous?
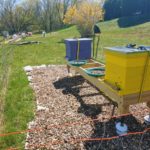
Bees are not dangerous unless they feel threatened. Building your bee hives in a quiet spot away from the close presence of people or pets will minimize risks.
Make sure also to use a beekeeping suit when inspecting the hive or harvesting honey.
What is the best bee hive for beginners?
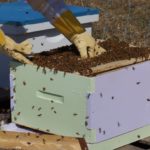
The best bee hive for a beginner is easy to access, allows for quick inspection, isn’t too heavy, and doesn’t have too many components that may require replacement.
Langstroth, Warre, top bar, and long hives can all be inspired choices. Look for beginner-friendly versions of any of these bee hives and you’re good to go.
Will an empty beehive attract bees?
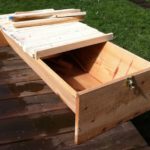
Yes, an empty bee hive can attract bees provided it’s placed in a good spot (check our tips for bee hive placement), and you have in your garden flowers that attract bees.
Also important is to make access into the hive easy for the bees. Explore bee hive plans now.
Lend the Bees a Hive, Won’t You?
More than a source of honey and an enjoyable hobby, creating your own bee hive is one way to help the bee population in your area thrive. You don’t have to know a lot about bees to build your own bee hive.
And you certainly don’t need to be a DIY pro. You don’t even have to build a hive if you don’t have time–you can always buy one ready made online.
Our world needs bees, and bees need a place to call their own. Creating a hive for them is one of the best things you can do for the planet right now.
Not to mention that it’s a wise and enjoyable pastime that will teach you so many things about bees, flowers, and nature as a whole. If you want to immerse yourself into nature and its cycles, bee hives can help you.
We hope this post has inspired you to build your own hive or at least to buy one.
Place it in a good spot in your backyard or bee garden and honey will be just one of the rewards you’ll get in return for your efforts. The others, though intangible, will be no less meaningful.
Now over to you.
Are you thinking of having your own bee hive? Has any of the designs we shared with you caught your imagination? Which one? Write to us–we’d be happy to hear from you!

Leave a Reply